Green Data Centers – How to Choose an Eco-Friendly IT Partner?
A Guide for Companies Looking for IT Providers Using Energy-Efficient Infrastructure and Renewable Energy
 Author:
Let’s take a closer look at the non-trivial issue of configuring Zabbix software. In the first article, we managed to install the Zabbix server along with the administrative panel available at ‘yourdomain.com/zabbix’, as well as the agent (if we chose the agent version).
What is an agent?
It’s worth asking the question: how can an administrator configure a server to transmit data about its state? One might suspect that not every server sends such data, and certainly not publicly. Here, so-called agent software comes to the aid of administrators. An agent is an application installed on the server system that the administrator wants to monitor. These programs can be divided into many categories, but the most important in our opinion is whether the agent is passive or active.
Since this article is about server monitoring, we assume that they are accessible from the Internet and that we use passive monitoring.
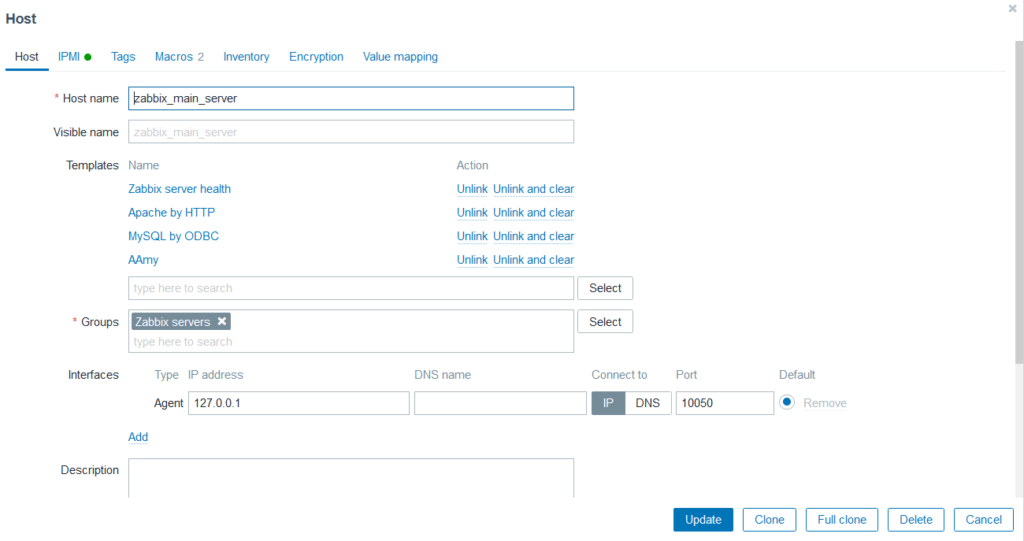
Picture 1. The configuration of the agent in the “hosts” tab of Zabbix software.
As we progress through the article, we will analyze the parameters visible in the image. For now, the fields that we can consider important are:
Installing the agent on a remote server
In addition to monitoring our own Zabbix server, it’s worth asking the question: how do we configure the agent on another server from which we want to retrieve data? Of course, you need to purchase a separate server, and then follow the instructions on this page https://www.zabbix.com/download. As with the Zabbix Server, agent software depends on the distribution and version of Zabbix that we have decided to use.
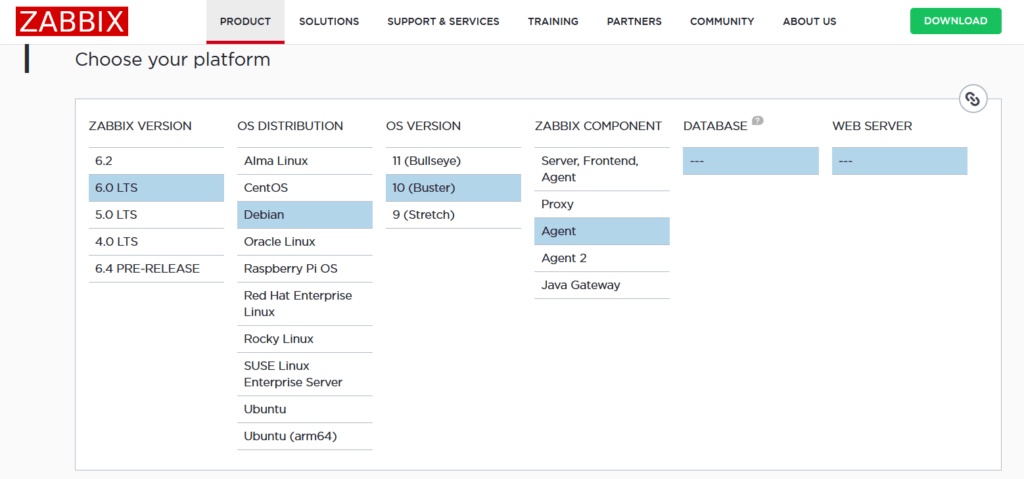
Picture 2. Selecting agent software from the Zabbix website
However, in this case, configuration editing will be needed because the server has a different IP address. After installation, we navigate to the /etc/zabbix folder and in the zabbix_agentd.conf file, we fill in two lines for passive and active monitoring:
Server=domainNameOfTheServer.com
ServerActive=domainNameOfTheServer.com
Hostname=agent_name
To apply the changes, the agent needs to be restarted. In the Debian distribution, we do this using: sudo service zabbix-agent restart
sudo service zabbix-agent status
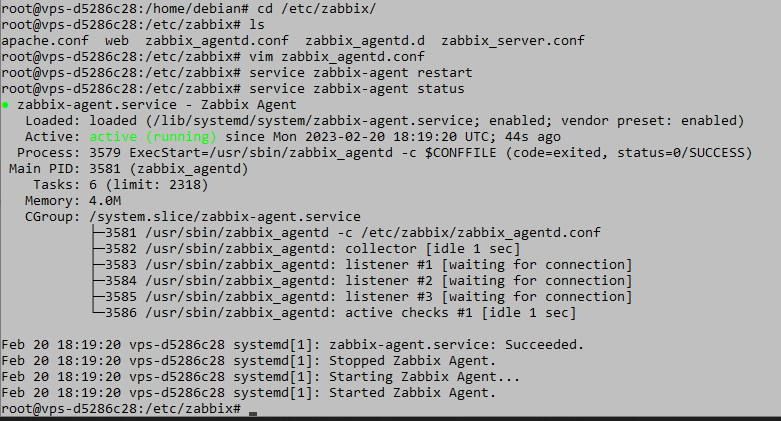
Picture 3. Resetting the Zabbix agent and checking its status
Next, you need to add the agent using the Zabbix administrator panel, remembering that the Host name must be the same as the one defined in the zabbix_agentd.conf configuration. If everything was done correctly, the agent should appear in the hosts tab in the administrator panel of our monitoring server.
Additional security measures
At this point, the network interface configuration of the agent is exposed to the world and anyone can connect to it. Since we use a passive model in which the server queries the agent, it would be necessary to configure the appropriate firewall rules so that the only traffic allowed on the agent port is that coming from the server. This can be done by entering the following command:
sudo iptables -A INPUT -p tcp –dport 10050 ! -s xx.xx.xx.xx -j DROP
where x is the ip address of the Zabbix server. Next we can use:
iptables –L
to check if the rule has been applied

Picture 4. Sample iptables content with blocking rule
Such firewall rules can often also be configured from the VPS server’s administrator panel that we purchased from the provider. It’s worth checking because such rules can be easily turned on and off if needed.
Encryption
Despite the fact that the previous configuration is quite safe, the data flowing from our agent server is still transmitted as an unencrypted string of characters. Zabbix allows for solving this problem in two ways:
cd /home
mkdir zabbix
cd zabbix
openssl rand -hex 32 > secret.psk
chown zabbix:zabbix secret.psk
chmod 640 secret.psk
Then, modify the /etc/zabbix/zabbix_agentd.conf file by adding the following lines:
TLSConnect=psk
TLSAccept=psk
TLSPSKFile=/home/zabbix/secret.psk
TLSPSKIdentity=your_agent_hostame
and then reload configuration with these commands:
sudo service zabbix-agent restart
sudo service zabbix-agent status
The final step of the configuration is to log in to the Zabbix server through the administrator panel and change the configuration in the Monitoring -> Hosts tab. You need to complete the identity provided in the agent and the generated key.
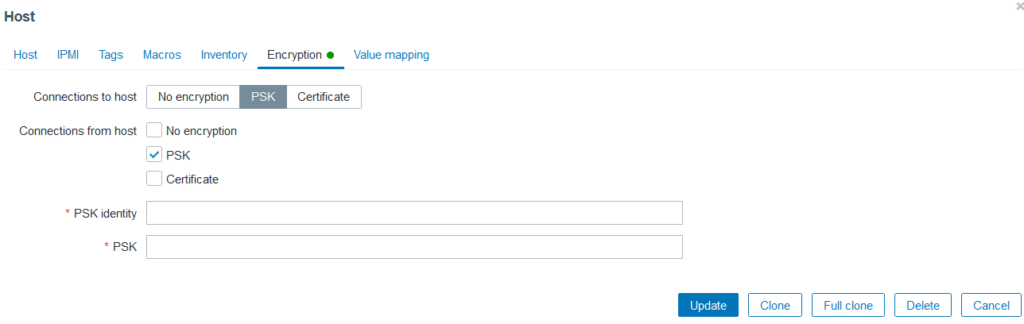
Picture 5. Encryption settings view from the Zabbix server administrator panel.
Summary
We have successfully configured the agent on a remote server and provided firewall protection and encryption. If there are errors in the configuration, check the letter case and accuracy of the changes made. In the next article, we will show how to use the administrator panel, what options are available, and what information we can obtain.
Sources:
https://www.zabbix.com/download
https://www.zabbix.com/documentation/1.8/en/manual/installation/requirements

Green Data Centers – How to Choose an Eco-Friendly IT Partner?
A Guide for Companies Looking for IT Providers Using Energy-Efficient Infrastructure and Renewable Energy
Green IT

Helm for the Second Time – Versioning and Rollbacks for Your Application
We describe how to perform an update and rollback in Helm, how to flexibly overwrite values, and discover what templates are and how they work.
AdministrationInnovation
Helm – How to Simplify Kubernetes Management?
It's worth knowing! What is Helm, how to use it, and how does it make using a Kubernetes cluster easier?
AdministrationInnovation